Marquis Spa Control Panel Instructions: A Comprehensive Guide
Navigating your Marquis spa’s features is simplified with a user-friendly control panel; understanding its functions ensures optimal relaxation and troubleshooting capabilities.
Understanding Your Marquis Spa System
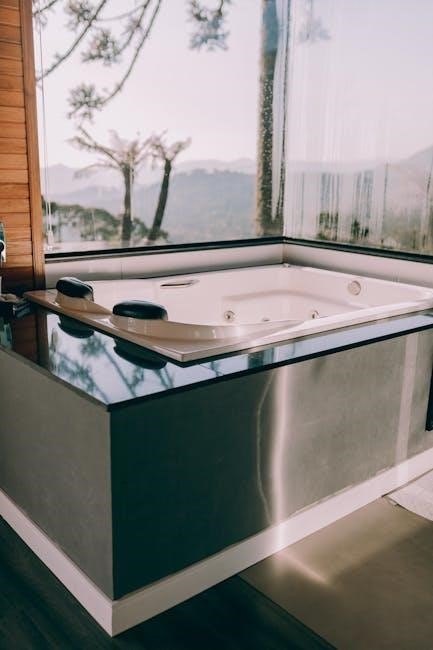
Marquis spas integrate sophisticated systems for water care, temperature regulation, and jet functionality, all managed through the control panel. Familiarizing yourself with these core components is crucial for maximizing your spa experience. The system relies on a heater to maintain desired water temperatures, a filtration system to ensure cleanliness, and a pump to circulate water and power the jets.
Understanding how these elements interact allows for efficient operation and proactive maintenance. The control panel acts as the central hub, providing access to adjust settings and monitor performance. Recognizing potential issues, like error codes or unusual behavior, becomes easier with a foundational understanding of the spa’s inner workings. Regular checks of water chemistry and filter cleanliness are vital components of maintaining a healthy and enjoyable spa environment.
Furthermore, knowing your specific model’s features, as variations exist across Marquis lines, will enhance your control panel navigation and overall spa enjoyment.
Control Panel Overview & Key Functions
The Marquis spa control panel typically features a user-friendly interface with buttons or touch-sensitive controls. Key functions include power on/off, temperature adjustment (up/down controls), jet control activation, and light control options. Many models display water temperature, filter cycle status, and error codes. Some advanced panels offer programmable schedules and economy modes.
The primary buttons allow for immediate adjustments to your spa experience. Temperature controls enable precise heating, while jet controls vary intensity and activation of different jet zones. Light controls offer ambiance with color options and modes. The display provides vital information at a glance, aiding in monitoring and troubleshooting.
Understanding the layout and function of each button is essential for seamless operation. Refer to your specific model’s manual for detailed explanations of all features and their corresponding controls.
Display Icons and Their Meanings
Marquis spa control panels utilize various icons to communicate system status and alerts. A snowflake icon typically indicates the heater is active, while a flame icon signifies heating is in progress. Filter icons display the filter cycle status – running, scheduled, or complete. Error codes, represented by alphanumeric combinations, signal specific issues requiring attention.
A “Low Water” icon warns of insufficient water levels, preventing pump damage. Icons for jet zones illustrate which jets are currently activated. Some models display icons for economy mode or sleep mode, confirming energy-saving settings are engaged. Understanding these icons is crucial for proactive spa maintenance.
Consult your spa’s manual for a comprehensive list of all display icons and their corresponding meanings. Ignoring error codes or warning icons can lead to more significant problems, so prompt attention is recommended.
Navigating the Control Panel Interface
Effectively managing your spa experience relies on mastering the control panel’s layout; intuitive buttons and a clear display provide seamless access to all functions.
Temperature Adjustment – Up/Down Controls
Adjusting the water temperature is a core function of your Marquis spa’s control panel. Typically, you’ll find dedicated “Up” and “Down” arrow buttons, often clearly labeled with temperature symbols or plus and minus signs. Pressing the “Up” button incrementally increases the set temperature, while the “Down” button decreases it.
The control panel displays the current water temperature alongside the set temperature. Allow ample time for the water to reach the desired temperature after making adjustments – this can take several hours depending on the spa’s size and ambient conditions. Some models feature a “Rapid Heat” or “Boost” function for quicker temperature increases, but be mindful of energy consumption when using these features.
Remember to avoid drastic temperature changes, as this can strain the heating system. Gradual adjustments are recommended for optimal performance and longevity. Always consult your specific model’s manual for detailed instructions and temperature range limitations.
Jet Control Operation – Basic & Advanced
Marquis spa jet control is managed through dedicated buttons on the control panel, offering both basic and advanced functionality. Basic operation usually involves a single “Jets” button to activate all jets simultaneously. Subsequent presses may cycle through different jet intensity levels – low, medium, and high.
Advanced control panels allow for zone control, enabling you to activate specific jet clusters independently. This customization lets you target different muscle groups for a personalized massage experience. Look for buttons labeled with zone names (e;g., “Foot,” “Neck,” “Back”).
Some models feature programmable jet sequences, allowing you to create and save custom jet configurations. Experiment with different combinations to find your preferred settings. Always ensure the water level is adequate before activating the jets for optimal performance and to prevent pump damage.
Light Control – Color Options & Modes
Marquis spas offer captivating underwater lighting controlled directly from the spa’s control panel. A dedicated “Light” button typically initiates a cycle through pre-programmed color options – often including a rainbow mode that smoothly transitions between hues.
Many models feature a selection of static color choices, allowing you to set a consistent ambiance. Advanced control panels may include brightness adjustment, letting you dim or intensify the lighting to suit your mood; Some systems offer synchronized light shows, coordinating the colors with the jet pulsations for a dynamic experience.
Explore the available modes by repeatedly pressing the “Light” button. Consider using softer colors for relaxation and brighter tones for a more energetic atmosphere. Remember to turn off the lights when not in use to conserve energy.

Advanced Features & Settings
Unlock deeper customization with features like filter cycles, economy mode for energy savings, and sleep mode, all accessible through the control panel interface.
Filter Cycle Management – Start & Duration
Maintaining pristine water quality in your Marquis spa relies heavily on effective filter management, conveniently controlled through the spa’s control panel. The filter cycle initiates a dedicated cleaning process, circulating water with increased force through the filter to remove debris and impurities.
To start a filter cycle, typically navigate to the “Filter” or “Maintenance” section on your control panel. You’ll usually find a button labeled “Start Filter Cycle.” The duration of the cycle is also adjustable, often offering options ranging from a short, 5-minute cycle for quick maintenance to a longer, 15-20 minute cycle for a more thorough cleaning.
Regular filter cycles – ideally, at least once a week – prevent clogging and maintain optimal water flow. The control panel may also display a reminder or prompt when a filter cycle is due. Ignoring this can lead to reduced jet performance and compromised water clarity. Always refer to your specific Marquis spa model’s manual for precise instructions, as control panel layouts and options can vary.
Economy Mode – Energy Saving Settings
Marquis spas offer an “Economy Mode” or similar energy-saving setting, accessible via the control panel, designed to reduce power consumption during periods of inactivity or when full performance isn’t required. This feature intelligently adjusts heating and pump operation to minimize energy usage without completely shutting down the spa.
Activating Economy Mode typically involves navigating to the “Settings” or “Energy” section of the control panel. Once enabled, the spa will maintain a lower water temperature, often around 80°F (27°C), and may reduce the frequency of pump cycles. This is ideal for overnight operation or when the spa isn’t in regular use.
Remember to deactivate Economy Mode before you plan to use the spa, allowing it to return to your preferred temperature and full functionality. Utilizing this mode can significantly lower your energy bills and contribute to a more sustainable spa experience. Consult your spa’s manual for specific instructions and customization options.
Sleep Mode – Reduced Power Consumption
Marquis spa control panels often include a “Sleep Mode” function, engineered for maximum energy conservation during extended periods of non-use. Unlike Economy Mode, Sleep Mode significantly reduces power consumption by minimizing nearly all spa functions, including heating and filtration, while still maintaining freeze protection.
To activate Sleep Mode, typically access the “Settings” menu on your control panel and select the “Sleep” option. When engaged, the display will often dim or turn off completely, and the spa will operate at a minimal power level. This mode is best suited for vacations or prolonged absences.
Upon returning, simply reactivate the spa through the control panel, allowing sufficient time for it to reheat and restore full functionality before use. Always refer to your specific model’s manual for detailed instructions and recommended reactivation times. Sleep Mode offers substantial energy savings and peace of mind.

Troubleshooting Common Issues
Addressing control panel problems involves checking error codes, reset procedures, and temperature calibration; these steps help restore functionality and ensure a seamless spa experience.
Error Code Interpretation – Common Codes & Solutions
Encountering error codes on your Marquis spa control panel signals a potential issue requiring attention. Understanding these codes is crucial for efficient troubleshooting. A common code, “E01,” often indicates a water temperature sensor fault, potentially requiring sensor replacement or wiring inspection. “E02” typically points to a heater malfunction, necessitating heater element testing or replacement.
Furthermore, “E03” suggests a flow sensor problem, possibly due to blockage or a faulty sensor. Regularly cleaning the filter can resolve this. “E04” often relates to a pressure switch issue, indicating potential plumbing restrictions or a malfunctioning switch. For codes like “E05” (ozone generator issue) or “E06” (low water level), consult your owner’s manual for specific solutions.
Remember to power cycle the spa after addressing any issue. If the error persists, contacting a qualified Marquis spa technician is recommended to prevent further damage and ensure safe operation. Ignoring error codes can lead to more significant and costly repairs down the line.
Control Panel Not Responding – Reset Procedures
When your Marquis spa control panel becomes unresponsive, several reset procedures can be attempted. First, try a simple power cycle: turn off the breaker supplying power to the spa for at least 60 seconds, then turn it back on. This often resolves minor glitches. If that fails, locate the reset button – typically a small, recessed button on the control panel itself – and press it with a pen or similar object.
For more persistent issues, a full system reset might be necessary. This usually involves accessing the control panel’s menu (if accessible) and selecting a “Reset” or “Factory Default” option. Caution: this will erase custom settings. If the panel remains unresponsive after these steps, check the GFCI breaker to ensure it hasn’t tripped.
If problems continue, consult your owner’s manual or contact a qualified Marquis spa technician. Avoid attempting complex repairs yourself, as this could void your warranty or create safety hazards.
Temperature Display Inaccurate – Calibration Steps
If your Marquis spa’s control panel displays an inaccurate temperature, calibration may be required. Access the control panel’s settings menu – the exact method varies by model, so consult your owner’s manual. Look for a “Calibration” or “Temperature Offset” option. This allows you to adjust the displayed temperature to match a reliable thermometer.
Begin by comparing the control panel reading to a calibrated thermometer placed in the spa water. Note the difference. Then, use the control panel’s adjustment controls to increase or decrease the displayed temperature until it matches the thermometer reading. Small adjustments are key; avoid large changes.
After calibration, allow the spa to run for several hours and re-check the temperature to ensure accuracy. Repeat the process if necessary. If calibration doesn’t resolve the issue, a faulty temperature sensor may be the cause, requiring professional service.
Maintenance & Care
Regular cleaning with a soft cloth keeps the panel pristine; protect it from harsh chemicals and direct sunlight for longevity and optimal functionality.
Cleaning the Control Panel Surface
Maintaining a clean control panel is crucial for both aesthetics and functionality. Begin by powering down the spa completely before any cleaning procedures. Use a soft, non-abrasive cloth – microfiber is ideal – dampened with a mild soap and water solution. Avoid harsh chemicals, solvents, or abrasive cleaners, as these can damage the panel’s surface and potentially affect its electronic components.
Gently wipe the surface, paying attention to areas where grime or residue may accumulate around the buttons and display. Never spray liquid directly onto the control panel; always apply it to the cloth first. After wiping, use a separate clean, damp cloth to rinse away any soap residue. Finally, dry the panel thoroughly with a clean, dry cloth.
For stubborn stains, a slightly dampened cloth with a diluted solution of white vinegar and water can be used, but test this in an inconspicuous area first. Regular cleaning – ideally weekly – will prevent buildup and ensure your control panel remains responsive and visually appealing.
Protecting the Control Panel from the Elements
Exposure to the elements can significantly shorten the lifespan of your Marquis spa’s control panel. Direct sunlight, rain, snow, and extreme temperatures can all cause damage. If possible, position your spa in a location that offers partial shade, shielding the control panel from prolonged sun exposure. Consider using a spa cover specifically designed to protect the entire unit, including the control panel, when not in use.
During inclement weather, ensure the spa cover is securely fastened to prevent water from accumulating around the control panel. Avoid allowing standing water to pool on or near the panel. Regularly inspect the area for any signs of water intrusion or damage.
If your spa is located in an area prone to freezing temperatures, take extra precautions to protect the control panel from ice and frost; A well-maintained cover and proper winterization procedures are essential. Preventative measures will help ensure long-term reliability.
Replacing Batteries (If Applicable)
Certain Marquis spa control panels utilize batteries to maintain settings during power outages or for specific functions. If your control panel displays a low battery indicator, or if settings are frequently lost, it’s time for a replacement. Always refer to your spa’s owner’s manual to identify the correct battery type and size required for your specific model.
Before replacing the batteries, power off the spa to prevent any electrical issues. Locate the battery compartment, typically found on the back or side of the control panel. Carefully remove the old batteries, noting the correct polarity (+ and -). Insert the new batteries, ensuring they are aligned properly.

Securely close the battery compartment and power on the spa. Verify that the control panel is functioning correctly and that the settings have been retained. Dispose of the old batteries responsibly, following local regulations for battery recycling.

Specific Model Variations
Marquis spa control panels differ across models, offering unique features and layouts; consulting your owner’s manual reveals specific functionalities and access methods.
Control Panel Differences Across Marquis Spa Models
Marquis Spas offers a diverse range of models, and consequently, their control panels exhibit notable variations. Earlier models often featured simpler, button-based interfaces, prioritizing essential functions like temperature adjustment and jet control. These panels typically utilized a limited number of icons to indicate operational status.
However, more recent Marquis spa models have transitioned to more sophisticated touchscreen control panels. These advanced interfaces provide a wealth of features, including customizable settings, programmable filter cycles, and integrated Wi-Fi connectivity for remote control via smartphone apps. The touchscreen displays offer clearer, more detailed information and allow for easier navigation through the spa’s various functions.
Furthermore, some high-end Marquis models incorporate advanced control systems with features like energy-saving modes and multi-zone heating control. These panels may also include diagnostic capabilities to assist with troubleshooting. It’s crucial to consult the specific owner’s manual for your Marquis spa model to fully understand the capabilities and operation of its control panel.
Accessing Model-Specific Features
Unlocking the full potential of your Marquis spa requires understanding how to access its model-specific features. On spas with touchscreen controls, these are typically found within the “Settings” or “Menu” section. Navigation often involves scrolling through options and selecting desired functions. Older, button-based panels may utilize a combination of button presses to access advanced settings, as detailed in the owner’s manual.
Features like programmable filter cycles, light therapy modes, and economy settings are often customized through these menus. Wi-Fi enabled models allow remote access via a smartphone app, providing control over spa functions from anywhere with an internet connection.
Marquis Spas frequently updates its software, so checking for firmware updates (if available) can unlock new features and improve performance. Referencing your spa’s manual is essential, as the exact steps for accessing these features vary significantly between models.
Updating Control Panel Firmware (If Available)
Maintaining optimal performance of your Marquis spa control panel often involves updating its firmware, if the model supports it. This process typically requires a USB drive and a connection to the spa’s control system. First, download the latest firmware file from the official Marquis Spas website, ensuring it’s compatible with your specific model.
Next, format a USB drive to FAT32 and copy the firmware file onto it. Access the control panel’s “Settings” or “Maintenance” menu, and locate the “Firmware Update” option. Follow the on-screen prompts to initiate the update process. Crucially, do not interrupt the update; power loss during this stage can damage the control panel.
The update may take several minutes to complete. Once finished, the control panel will usually restart automatically. Always consult your owner’s manual for detailed, model-specific instructions before attempting a firmware update.
Safety Precautions
Always prioritize electrical safety around the control panel, avoiding water exposure and promptly addressing any damage; utilize emergency shut-off procedures when needed.
Electrical Safety Around the Control Panel
Maintaining a safe environment around your Marquis spa’s control panel is paramount. Never operate the spa with a damaged power cord or control panel; immediately discontinue use and contact a qualified technician. Ensure the control panel is properly grounded to prevent electrical shock. Avoid using extension cords, as they can pose a safety hazard.
Keep the control panel dry at all times. Water and electricity are a dangerous combination. If water comes into contact with the control panel, immediately turn off the power at the breaker. Do not attempt to operate the control panel with wet hands or while standing in water. Regularly inspect the area around the control panel for any signs of water leakage or electrical damage.
Remember to always disconnect the power supply before performing any maintenance or cleaning on the control panel. Never attempt to repair the control panel yourself; leave this to a qualified professional. Adhering to these safety precautions will help ensure a safe and enjoyable spa experience.
Water & Control Panel – Avoiding Damage
Protecting your Marquis spa’s control panel from water damage is crucial for its longevity and proper function. Avoid direct spraying of water onto the control panel during cleaning or filling the spa. Even seemingly small amounts of water can infiltrate the panel and cause corrosion or short circuits.
Ensure adequate ventilation around the control panel to prevent moisture buildup. Regularly inspect the seals around the control panel for any signs of damage or deterioration. If you notice any cracks or gaps, replace the seals immediately. Consider using a protective cover for the control panel when the spa is not in use, especially in humid environments.
Should water accidentally come into contact with the control panel, immediately turn off the power at the breaker and allow the panel to dry completely before attempting to use it. Ignoring water exposure can lead to costly repairs or complete control panel failure.
Emergency Shut-Off Procedures
Knowing the emergency shut-off procedures for your Marquis spa is paramount for safety. Locate the dedicated emergency shut-off button on your control panel – it’s typically a large, red button clearly labeled. In any situation where immediate power termination is required, such as a suspected electrical fault or a medical emergency, press this button firmly.
Additionally, familiarize yourself with the location of the circuit breaker that controls the spa’s power supply. In the event the control panel button fails, or for a complete power disconnect, switch off the corresponding breaker in your home’s electrical panel.
Remember to inform all spa users about these procedures. Regularly test the emergency shut-off button to ensure it functions correctly. Following these steps can prevent serious injury or damage in unforeseen circumstances, prioritizing safety above all else.